
- Create a new image
- Open, Show & Save images (PIL)
- Paste, Merge, Blend images (PIL)
- How to Draw shapes images (PIL)
- How to Crop an image (PIL)
- How to Add Text to images (PIL)
- How to Add Frames to images (PIL)
- How to Resize an image (PIL)
- Brightness, Contrast, Saturation
- Convert image to Grayscale | B&W
- Create Photo Collages
- Digital Image Color Modes
- Digital Image Basics
- Image Manipulation w/ PIL
- Batch Resize Multiple Images (PIL)
- Watermarking Images
- Difference Between 2 Images (PIL)
Pasting, Merging & Blending Images with Python (PIL)
You can combine, merge, blend or paste images for artistic or practical reasons and achieve ingenious results. You can also come up with creative backgrounds or different textures to add to your digital images.
In this tutorial, we will elaborate different methods for combining images, elaborate transparency settings for merging images and provide plenty of Python examples to communicate these ideas efficiently.
What is merging images?
Merging an image means combining parts of two or more images to achieve a composition. Pasting images can be useful for creating presentations, art, special effects and rich compositions. Image pasting is a powerful concept in Python’s PIL library.
Holy Python is reader-supported. When you buy through links on our site, we may earn an affiliate commission.
Image.paste method
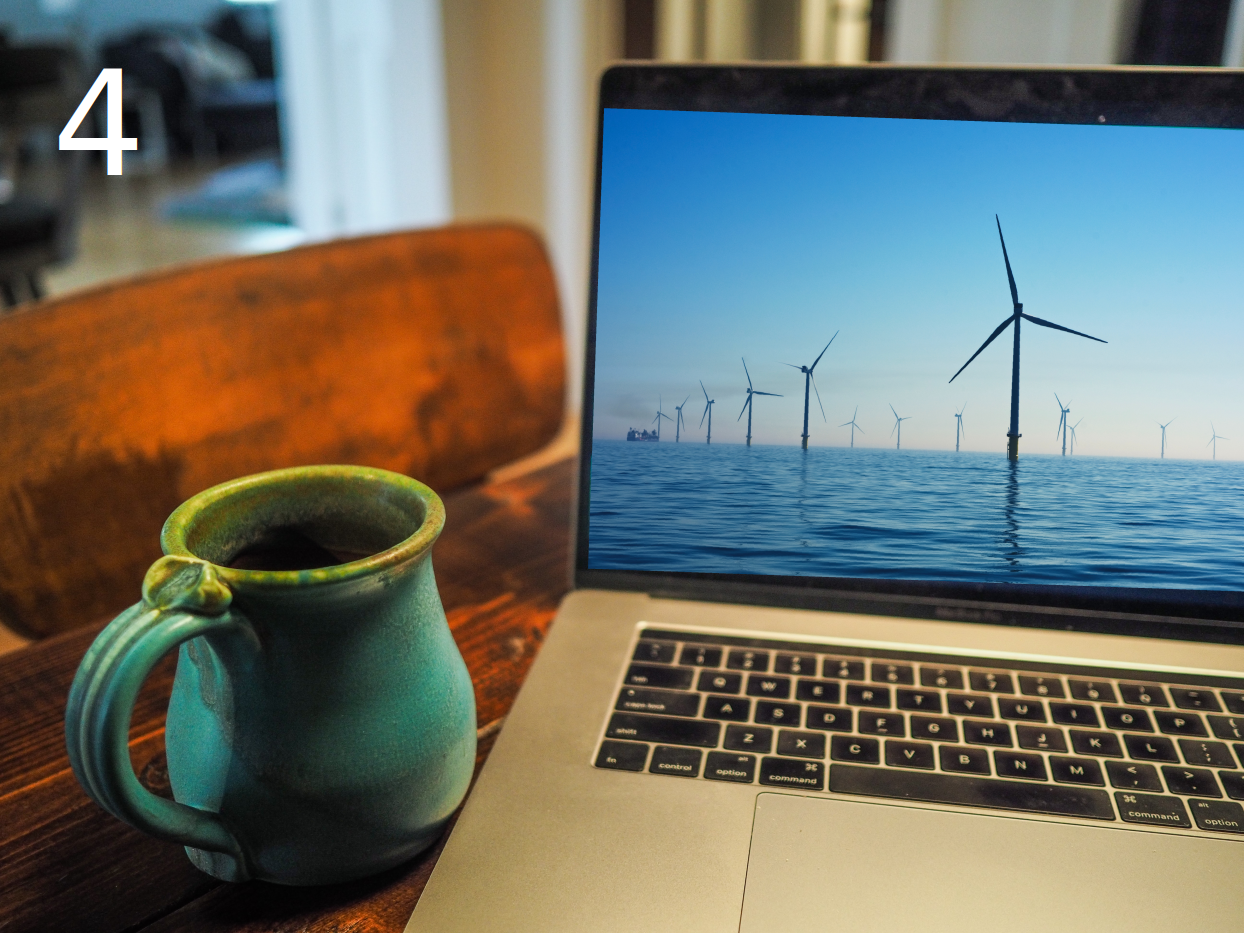
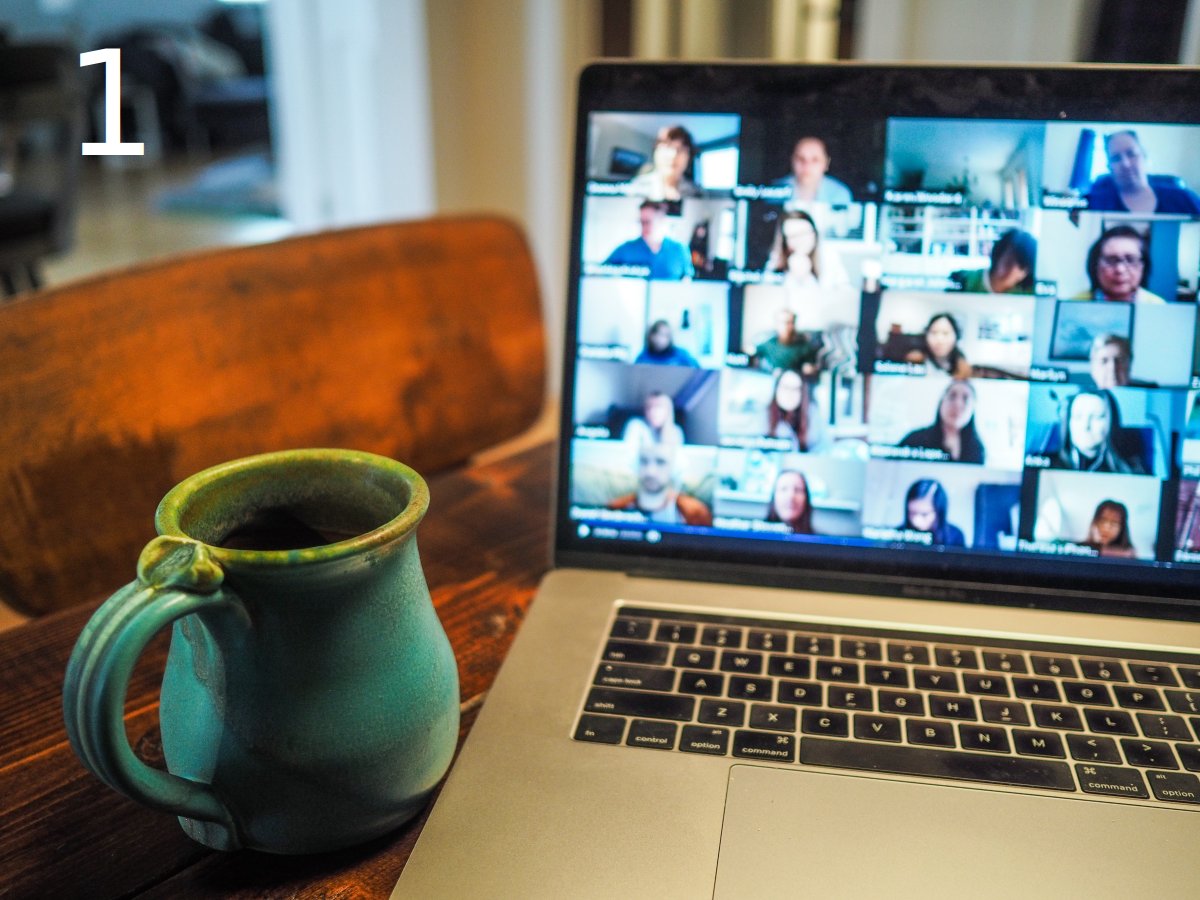
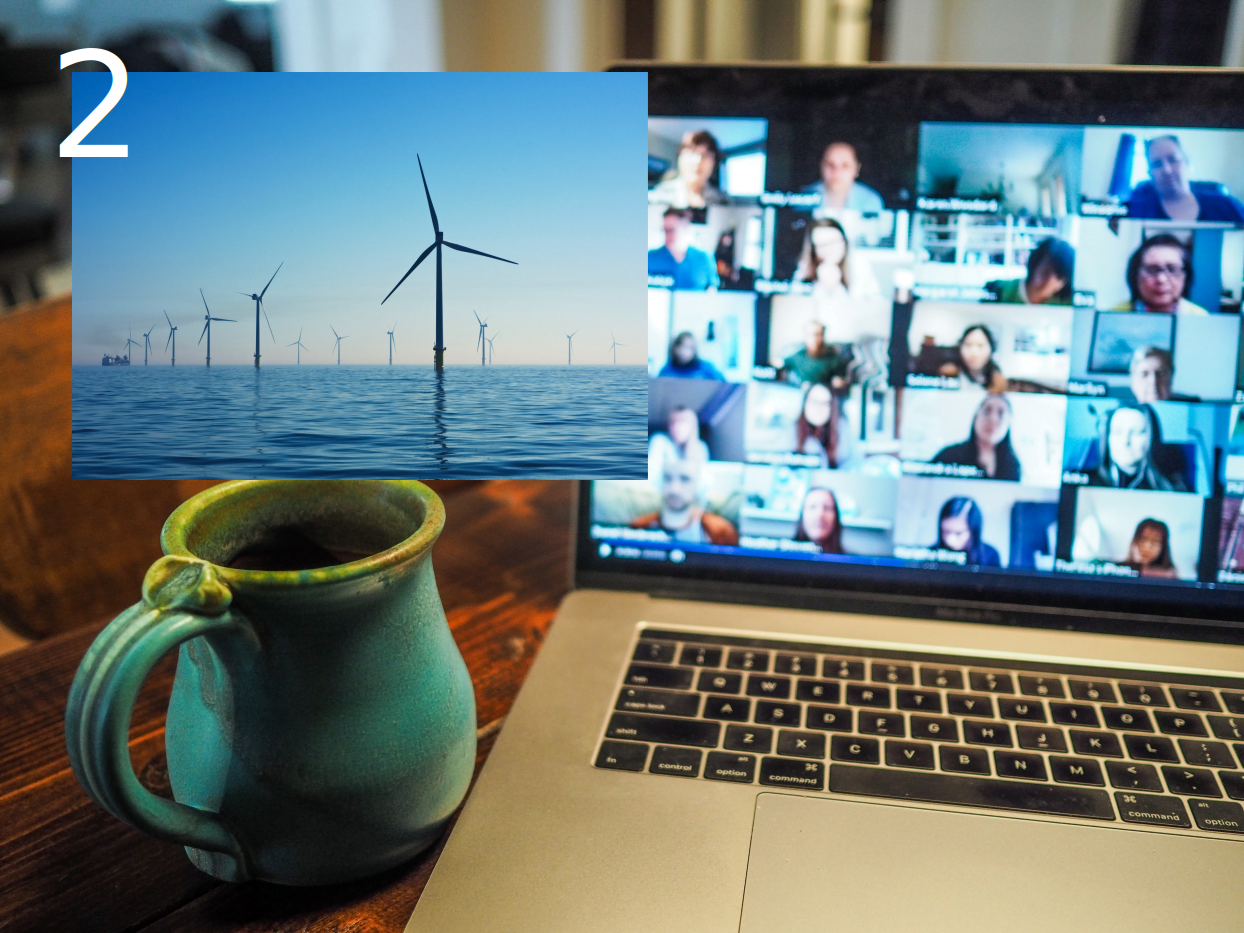
img.paste(img2, (400,400))img.paste(img2, (400,400,1200,1200))Example 1: Paste Method
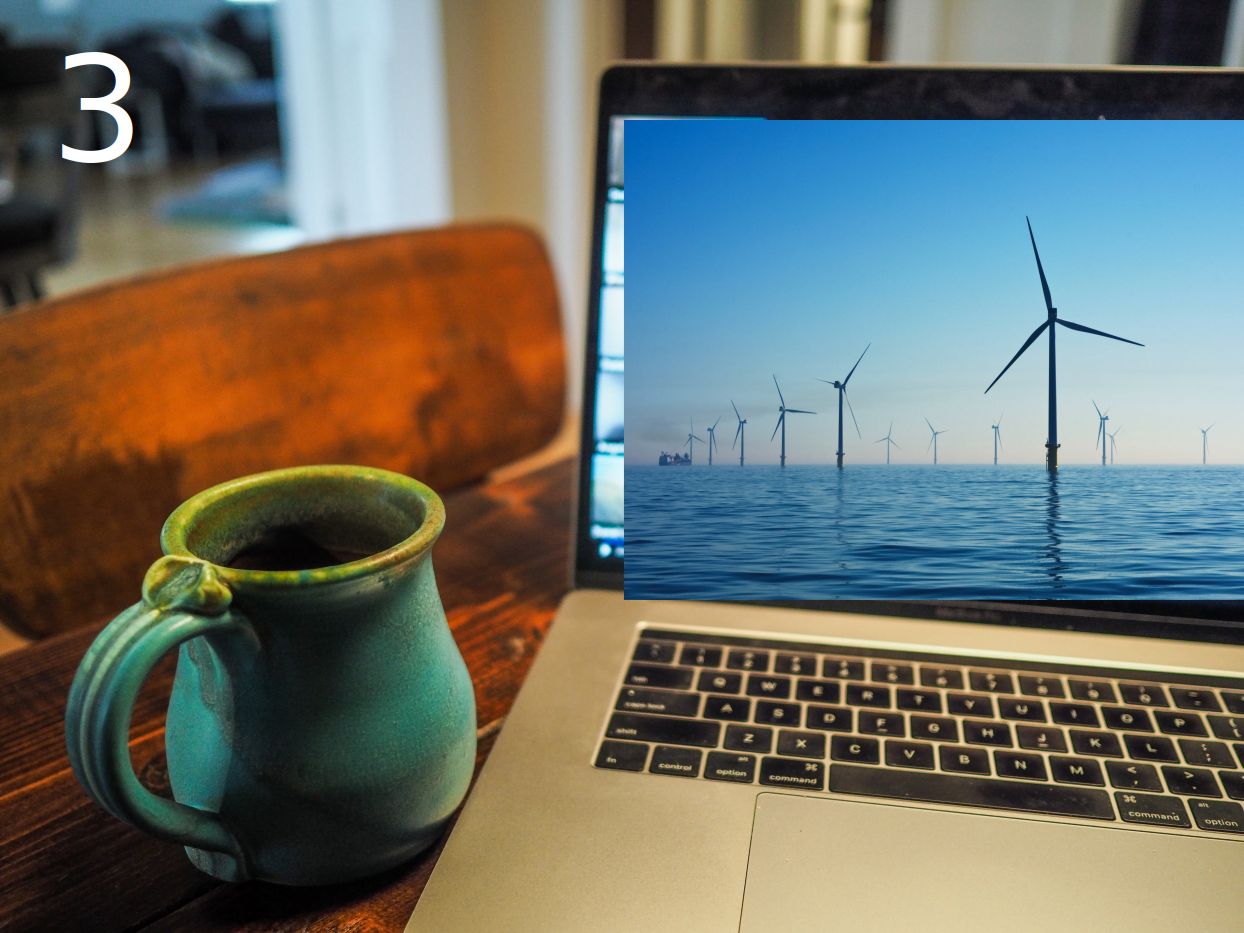
from PIL import Image

img = Image.open("/home/zoom_call.jpg")
img2 = Image.open("/home/wind_turbines.png")

img.paste(img2, (400,400))
img.show()
from PIL import Image

img = Image.open("/home/zoom_call.jpg")
img2 = Image.open("/home/wind_turbines.png").resize((2750,1920)).rotate(-2, expand=1)

img.paste(img2, (2450,450))
img.show()
from PIL import Image, ImageDraw

img = Image.open("/home/zoom_call.jpg").convert("RGBA")
img2 = Image.open("/home/wind_turbines.png")
.resize((2750,1920)).rotate(-2, expand=1)

img.paste(img2, (2450,450), mask=img2)
img.show()
So, that’s the final code that’s been used to create the final image. A few important points:
- First image (base layer) is a jpg without transparency. We can convert it to have RGBA mode to be able to paste images and conserve the transparency when needed. So, the .convert(“RGBA”) method is often convenient. We will heavily use it in the examples below which involve transparency channels.
- Second image. This is the image being pasted on top. To perfect the pasting operation so the image fits the laptop screen we need to:
- resize the image (.resize() method, new dimensions passed as tuple)
- rotate the image (.rotate() method, rotation degree passed)
Final result achieved by a few adjustments is nearly perfect and it can all done from the command line environment (cli). Another big advantage of computational photography or more specifically batch editing digital images with Python is that you can scale it to thousands or even millions of images.
Mask argument explained
Another important component of computational image pasting is the mask argument. Mask is necessary when the image being pasted requires some kind of transparency. (For example, image being pasted is an apple but since all images have a box shape the areas surrounding the apple might have no image data except transparency.)
- Mask layer: Mask argument must be used when pasting images with transparency. Mask argument takes any image and communicates to python that only pixels with information should be pasted (fully transparent pixels of the mask layer will be neglected in paste operation)
One thing that’s commonly confused is the usage of mask layer. Mask layer only determines the coordinates of the pixels that are being passed, the actual image being pasted is still the image that’s passed to .paste() method as the first argument.
In summary, coordinates of pasting comes from the mask argument (or mask layer provided by it) and the actual visual that’s being pasted comes from a separate image.
So it’s convenient that in many examples, mask argument and the image being pasted will be the same image. It’s useful when pasting an image to assign the coordinates and the visual of the non-transparent part to be the same image if that’s the goal.
But if you are looking to paste, say an orange in an apple shape this can also be possible in which case mask image will be different than the image being pasted.
Two important properties of the image being passed to the mask argument are as below.
- Mask image must always be the same size as the image being pasted. It can be a different image with different transparency data but the images sizes must be the same.
- Mask image must be in RGBA mode for color images.
- Mask image can also be in L (whitegray) mode, in that case black pixels will be left out (pixels equaling 0) and only pixels with a value other than 0 will be pasted.
Example 2: Mask argument
Here we have a Python example that might be even more useful to understand how mask argument works.
from PIL import Image, ImageDraw

img = Image.new("RGBA", (2000,2000))
img2 = Image.open("/home/usa/Downloads/orange_2.jpg").convert("RGBA").convert("RGBA")
x, y = img2.size
img3 = Image.open("/home/usa/Downloads/transparent-apple-21.png").resize((x,y))

img.paste(img2, (0,0), mask=img3)

img.show()
- A base layer being used for everything to be pasted on it.
- An orange image that’s being pasted on the base.
- An apple image that’s being used as the mask argument.
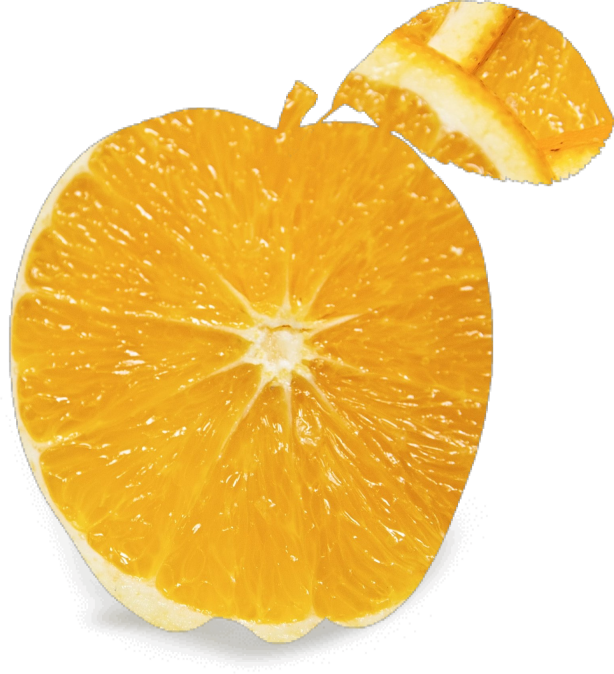
You can use the same technique to create infinite cool combination. A city photo in a car shape, puppy in a heart shape, an oil refinery in a wind turbine shape are just a few other ideas.
Image.composite method
Composite method works very similarly to the .paste() method. The main difference is the way they are applied. While .paste() method is applied on the image as an image method, composite works as a function and it needs both images to be passed as arguments inside it. Check out the mini examples below.
img1.paste(img2, (100,100))Image.composite(img1, img2)
Composite is an ancient word and it signifies physical or digital things which are composed of multiple parts.
In science and technology, composite is a popular and commonly used term such as composite material, composite signal, composite numbers and composite images. For example, space crafts have heat shield made of composite material (such as fibrous refractory which can withstand unimaginable orbit entry conditions. Google Patent)
Composite comes from Latin roots of com (with, together) + posite (position).
Anyway, back to composite method for pasting images. .composite() method has a couple of drawbacks to the previously demonstrated .paste() method.
Disadvantages of composite method:
- Both images need to be the same size for composite method
- Both images need to be the same mode for composite method
- Paste method has a box argument which allows assigning the coordinates of the top left corners of the image being pasted in relation to the base image.
Example 3: Composite Method
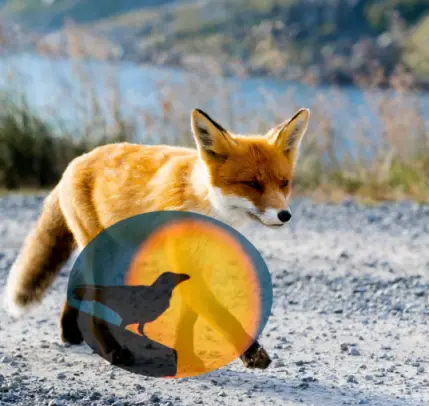
Python code below creates an image mask in ellipse mode. Check out how to draw geometric shapes on images with Python tutorial to learn more about drawing ellipses, circles and other shapes with Python Image Library (PIL).
from PIL import Image, ImageDraw

img = Image.open("/home/fox.jpg").convert("RGBA")
mask = Image.new("L", img.size, 0)
draw = ImageDraw.Draw(mask)
draw.ellipse((300, 1500, 1220, 2250), fill=185)

x,y = img.size
img2 = Image.open("/home/crow.jpg").convert("RGBA").resize((x,y))

img3 = Image.composite(img2, img, mask=mask)
img3.show()
Blend method
Image.blend(img1, img2, alpha)from PIL import Image
img = Image.open("/home/orange.jpg").convert("RGBA")
x, y = img.size
img2 = Image.new("RGBA", (x,y), color="red")
img3 = Image.blend(img,img2, 0.7)
img3.show()
Example 4: Blend Method
Below we have a Python example regarding the blend method which shows blending of a new image with plain red color and an orange image using the blend method and various alpha values.
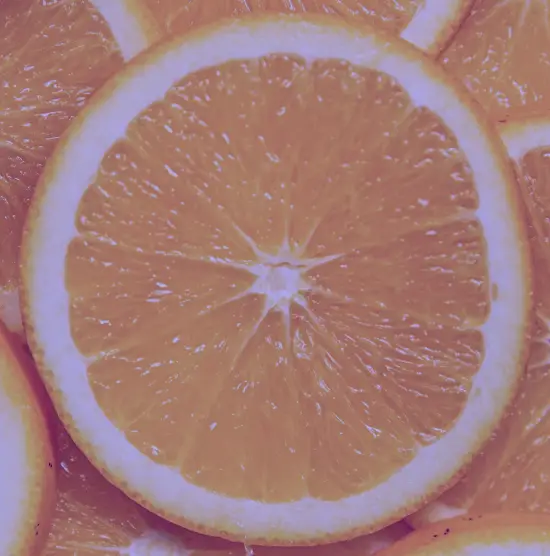
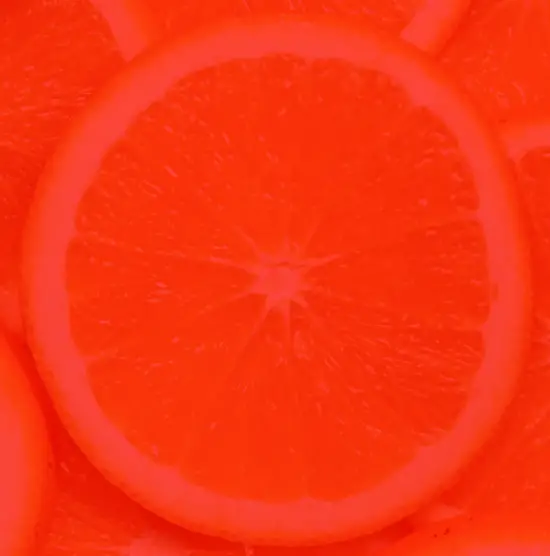
So blend method can be convenient for overlaying images when no transparency is involved. There are pros and cons of this method as following.
Pros of blend:
- Very simple to use
- Unique constant alpha to decide blending ratio
Cons of blend:
- No mask means no pasting in specific shape
- Images must be the same size always
- Images must be the same color mode.
If when using .blend() method, image sizes don’t match you will get an error similar to below.
return im1._new(core.blend(im1.im, im2.im, alpha))
ValueError: images do not match
This error is easy to fix, you just need to resize or crop the images so that they have the same height and width.
Alpha Composite method
Image.alpha_composite(img1, img2)Important thing is since there is no alpha adjustment parameter or
mask argument, images will need to have appropriate transparency values
beforehand.
RGBA Image Mode
RGBA is a useful color mode that can be applied to images. Most colorful digital images you come across in daily life will either have RGB or RGBA color modes..putalpha() method for filling the transparency channel
.putalpha is a very convenient method that can be applied to images with Python’s PIL library.Important thing is since there is no alpha adjustment parameter or
mask argument, images will need to have appropriate transparency values
beforehand.
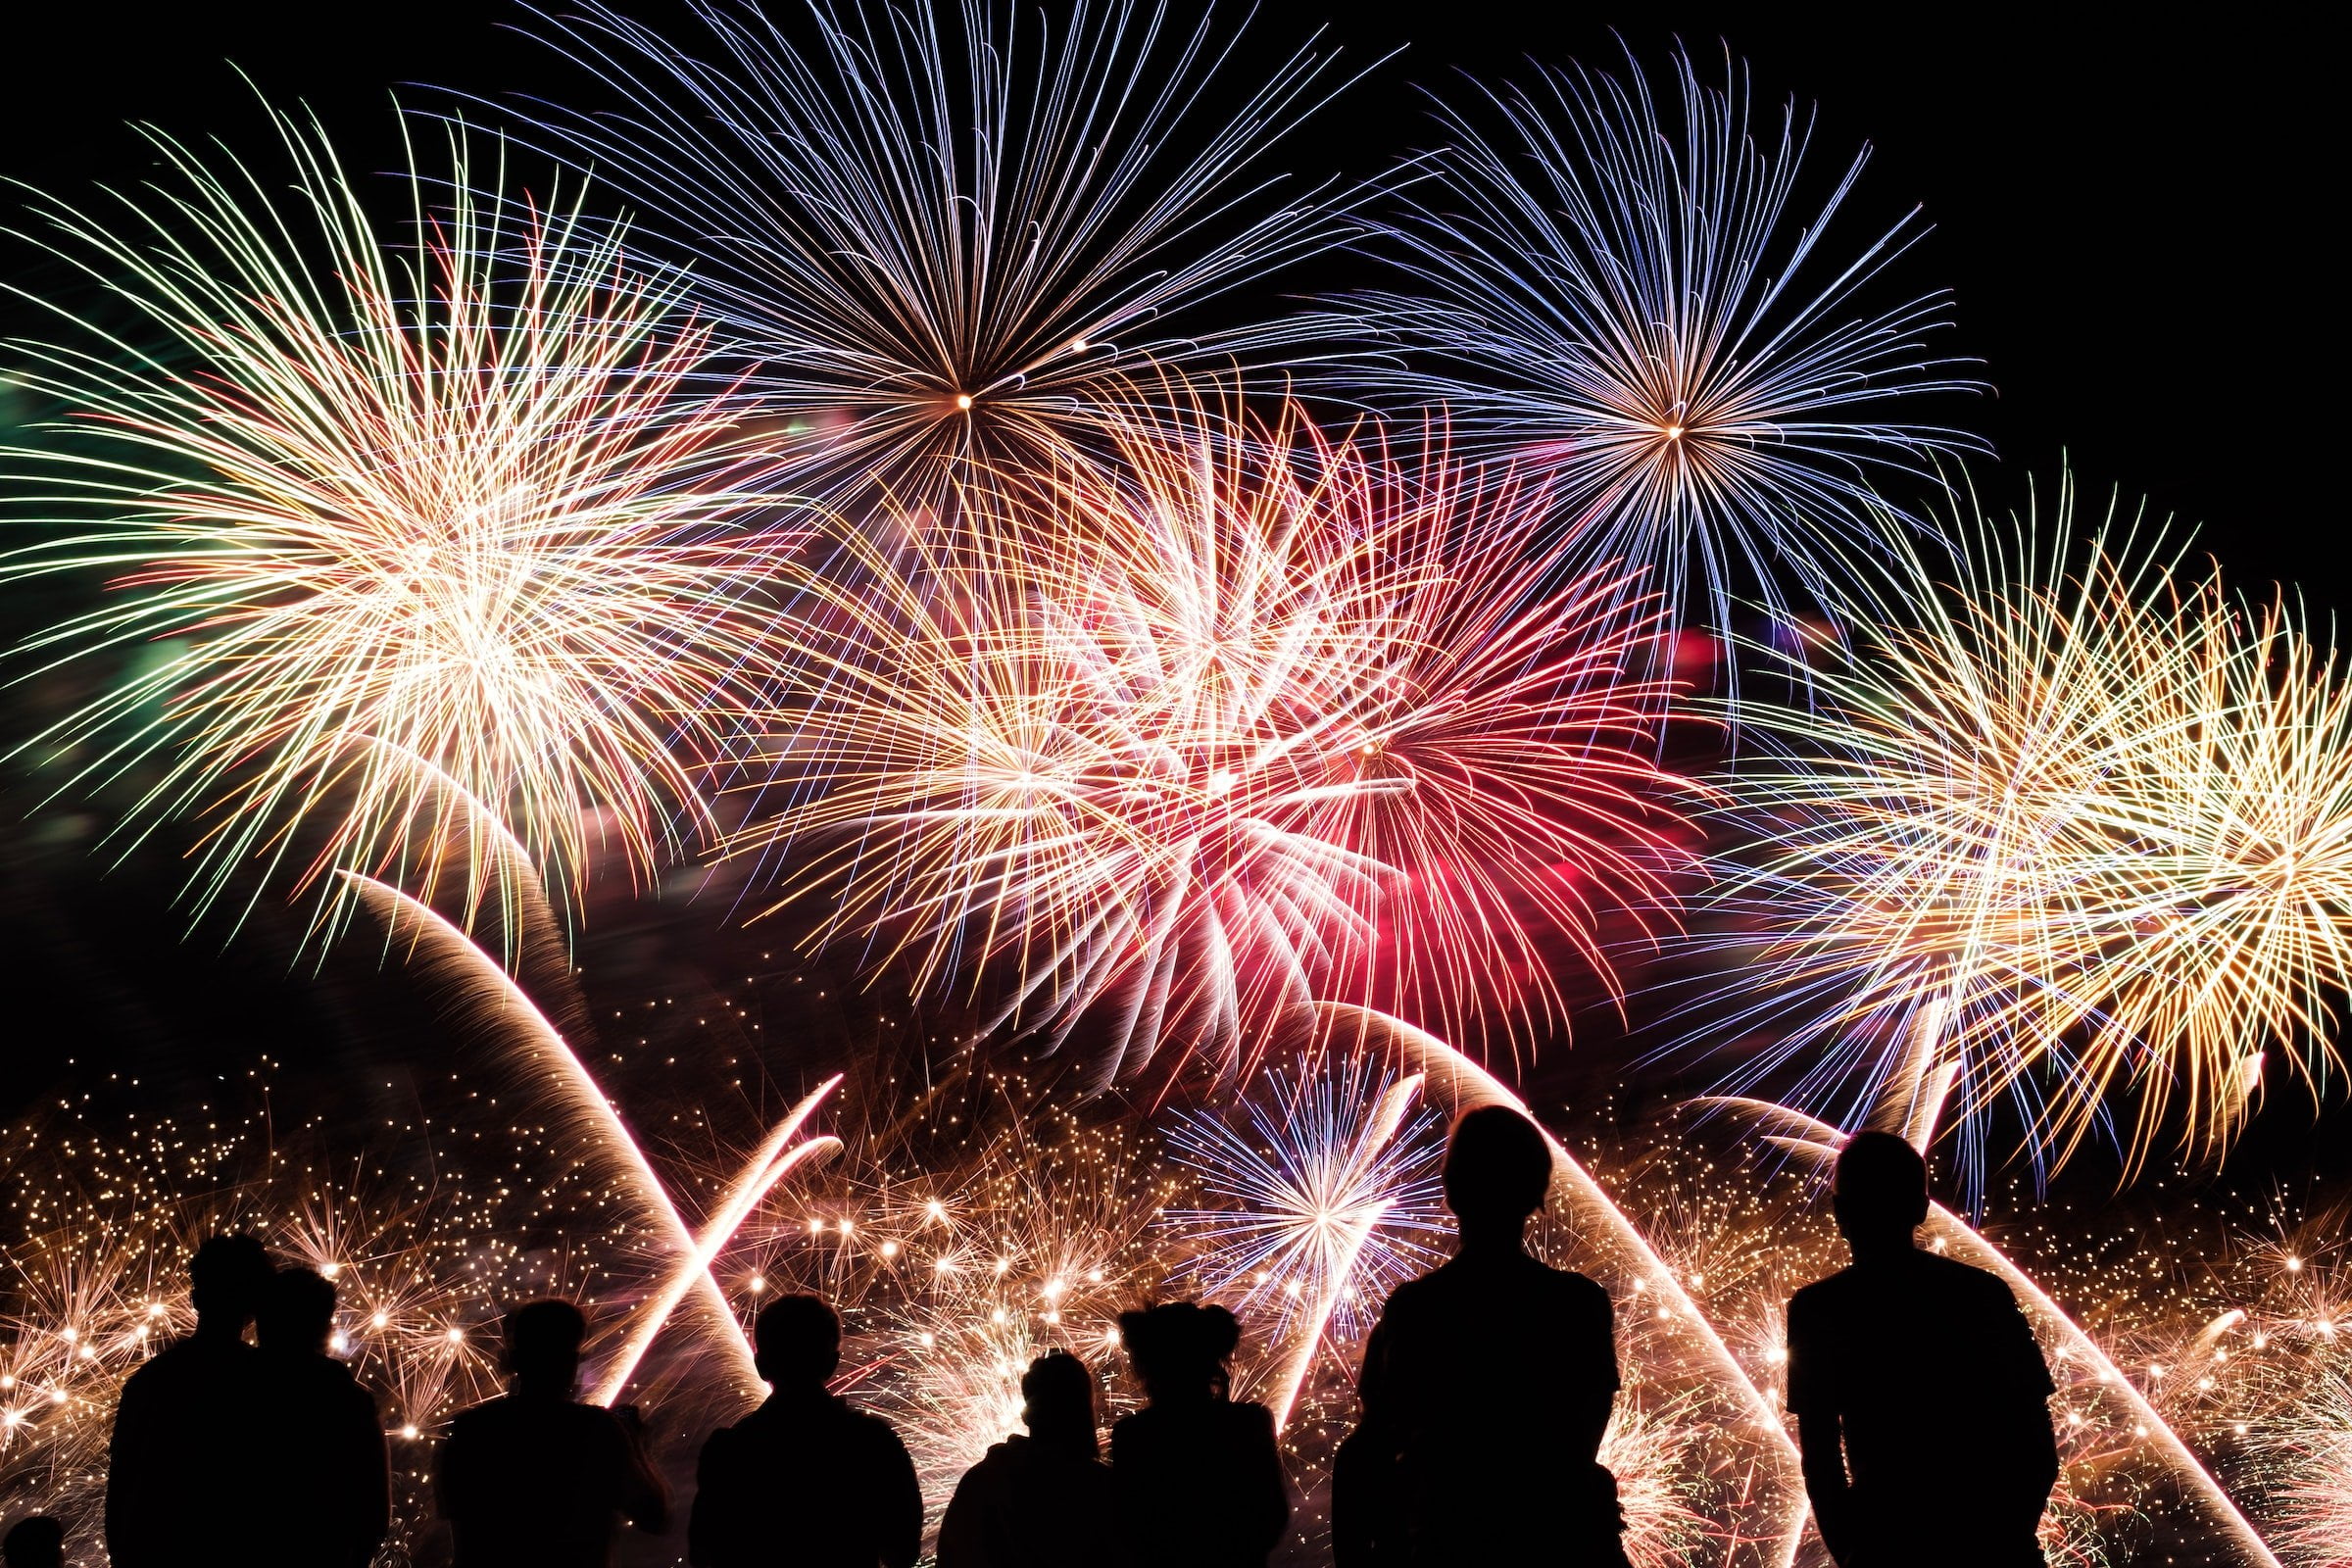
Example 5: Alpha Composite Method
Below you can see the usage of the alpha_composite method in combination with the .putalpha method which is also explained down below.
from PIL import Image, ImageDraw

img = Image.open("/home/usa/Downloads/leio-mclaren-FwdZYz0yc9g-unsplash.jpg").convert("RGBA")
x,y = img.size
img2 = Image.open("/home/usa/Downloads/arthur-chauvineau-Dn7P1U26ZkE-unsplash.jpg").convert("RGBA").resize((x,y))

img.putalpha(225)
img2.putalpha(45)

img3 = Image.alpha_composite(img, img2)
img3.show()


putalpha(225)
putalpha(45)

putalpha(255)
putalpha(75)
- Alpha_composite only accepts 2 arguments: image1 and image2.
- Alpha_composite doesn’t have mask argument.
- Alpha_composite needs transparency channel (A of RGBA) to work
- Transparency channel can be filled using putalpha() method. putalpha() accepts any value between 0 and 255. The higher the value the more opaque the image will be (You can see different image examples above).
Summary
In this Python Tutorial we learned how to paste, blend, mix and overlay images using different techniques from the Image module of PIL library.
To achieve various image merging results we used Python methods such as .paste(), .composite(), .alpha_composite() and .blend().
We also supportive classes and methods such as RGBA images, .convert() method, .resize() method, .putalpha() method, .size attribute and we made use of the mask argument when available.
- Example 1: How to paste wind turbine image on laptop screen (paste)
- Example 2: How to paste an orange in apple shape (paste with mask)
- Example 3: How to paste crow image on fox image (composite)
- Example 4: How to blend orange with red background (blend)
- Example 5: How to merge airplane with fireworks (alpha_composite)
You can consider revisiting our basic image editing tutorials such as, resizing images, creating new images, saving images and cropping images.