What's Watermarking?
Watermark is a semi-transparent text or logo that sort of blends with an image in the background to make the image more difficult to copy or share without appropriate references.
Watermark is an old idea (usually applied to money, stamp or institutional papers) that’s been adapted nicely to the digital image practices.
Holy Python is reader-supported. When you buy through links on our site, we may earn an affiliate commission.
Why does someone need Watermarking?
The need for watermarks arises in situations like:
- When you’d like to make your mark on your digital product.
- When you want to discourage copying of your material
- To make copyright claims known without blocking image’s visibility
- To communicate a message such as on digital images, pitch deck or business presentations: Confidentiality, Warning, Incomplete, TBD (to be decided) etc.
- For marketing reasons
- To gain more recognition etc.
So, if you own or work with a business, website, blog, professional career, startup, book, e-book, reports or if you’re involved with digital photography at a professional level chances are very high that you will at some point need watermarking tools.
Why Watermark with Python or another programming language?
Python works phenomenally with Watermarking as it does in so many other occasions. We live in a competitive world and competing well also means optimizing your time, optimizing your routine tasks, decreasing labor and increasing intellectual work that creates value.
Watermarking can be time-consuming, tedious and distracting. Definitely not a very intellectual occupation. With coding you can make it a 1-click automated process saving you tons of time and focused work in future. This is the kind of optimization that makes individuals and businesses thrive.
You can fine tune many parameters: text color, transparency, randomness, location, transparency via alpha channel, image type, watermark message etc.
- You can formulate your watermarking process
- For instance, there is a big difference between saying place watermark in (300,200) coordinates and saying place watermark in (image_height/2, image_width/2) You get the point right? This leads to automation and opens doors to a new world such as batch editing, scripting etc.
- You can create your own software
- You can automate Watermarking process and make it a 1-click solution in future.
- It’s much less resource-hungry compared to GUI alternatives like Photoshop or GIMP
- If written well it won’t cause freezing or glitches as heavy GUI alternatives sometimes do
- It’s a great way to practice coding , conceptualizing, planning, automation and intellectual thinking
Watermarking with Python Tutorial (Applying Text)
We’re going to use PIL imaging library of Python in this tutorial.
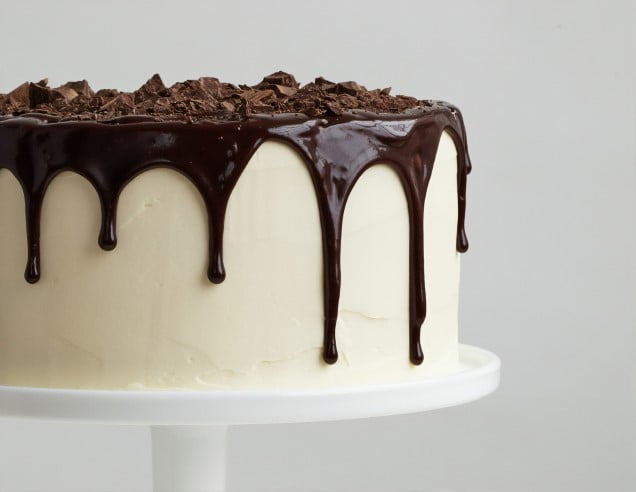
Let’s first create a text on the image without transparency. We got an appetizing image that can be worked on.
We’ll apply a text on the image in about 7 steps:
- Import the libraries (Image, ImageDraw and ImageFont from PIL library)
- Open the image to work on
- Create draw object (this is a handle that takes the opened image as argument)
- Create text and font object (we’re selecting arial as font and 82 as size) Font size here can be formulated proportional to image size. Especially in a batch processing scenario font can appear too small or too big as image resolution fluctuates if it’s given as a constant integer.
- We’re simply calculating x and y coordinates for text. Horizontally it’s in the middle and text size is also encountered. Vertically it’s 300 pixels up from the end of the image.
- Simply saving the new image. You can use the same path and name which will overwrite the original image. Or, if you want to keep the originals as is, you can give it a new name as in the example. At this step, you can also convert the image type if it’s more convenient for you. For instance, we’re starting with a .jpg image and converting it to .png at the saving step.
from PIL import Image, ImageDraw, ImageFont

#Opening Image
img = Image.open(r'Desktop/cake.jpg')

#Creating draw object
draw = ImageDraw.Draw(img)

#Creating text and font object
text = "HolyPython.com"
font = ImageFont.truetype('arial.ttf', 82)

#Positioning Text
textwidth, textheight = draw.textsize(text, font)
width, height = img.size
x=width/2-textwidth/2
y=height-textheight-300

#Applying text on image via draw object
draw.text((x, y), text, font=font)

#Saving the new image
img.save(r'Desktop/cake_watermarked.png')
Great, we’ve made our mark on the image. Now, let’s get more sophisticated.
Although nothing too complex, adding transparency to image slightly complicates the process. But, don’t worry, once you understand it or implement it, it’s actually pretty reasonable.
We will achieve transparency through alpha channel in an RGBA (stands for red-green-blue-alpha) type image. Each of these R-G-B-A channels take an integer value between 0 and 255. So if Alpha equals 25 it will approximately equal to 10% transparency.
Check out this example (0, 0, 0, 25). This image has all RGB channels set to 0, which means black color and then Alpha Channel is equal to 25 which means 10% transparent.
On the other hand you’ll most likely prefer a light color like white for your watermark, so we will use an RGBA combination similar to: (255, 255, 255, 25)
You can check out this digital image basics tutorial in Python if you’d like to polish your knowledge about digital images from coding perspective.
Creating Transparent Text (Watermark)
Now, let’s create a transparent watermark as it’s usually meant to be.
It may appear complicated, it’s not.
The only difference here are:
We will convert the image we’re opening to RGBA so it includes an alpha channel which we will work with.
We will create a new transparent image. Semi-transparent text will be applied to this image. You can think of it as a text layer to speak with Photoshop or Gimp lingo. This will be achieved using .new() method of Image module.
While saving, we will combine both images (original image and transparent text layer). This will be achieved using .alpha_composite(img1, img2) method of Image module.
#Importing Libraries
import random
from PIL import Image, ImageDraw, ImageFont

#Opening Image & Creating New Text Layer
img = Image.open(r'Desktop/cake.jpg').convert("RGBA")
txt = Image.new('RGBA', img.size, (255,255,255,0))

#Creating Text
text = "HolyPython.com"
font = ImageFont.truetype("arial.ttf", 82)

#Creating Draw Object
d = ImageDraw.Draw(txt)

#Positioning Text
width, height = img.size
textwidth, textheight = d.textsize(text, font)
x=width/2-textwidth/2
y=height-textheight-300

#Applying Text
d.text((x,y), text, fill=(255,255,255, 125), font=font)

#Combining Original Image with Text and Saving
watermarked = Image.alpha_composite(img, txt)
watermarked.save(r'cake_watermarked50.png')
- Importing Libraries: This step is self-explanatory we’re importing Image, ImageDraw and ImageFont from PIL library.
- Opening Image & Creating New Text Layer:
- Here we’re opening the original image but also immediately converting it to RGBA using
.convertmethod. - Also, we’re creating a new text layer, which is also RGBA, with full transparency (alpha channel is 0).
- Here we’re opening the original image but also immediately converting it to RGBA using
- Creating Text: Text is defined as before and font object is also created.
- Creating Draw Object: Another standard procedure, draw object is created.
- Positioning Text: Image position is calculated similar to previous operation, horizontally centered and 300 pixels from below.
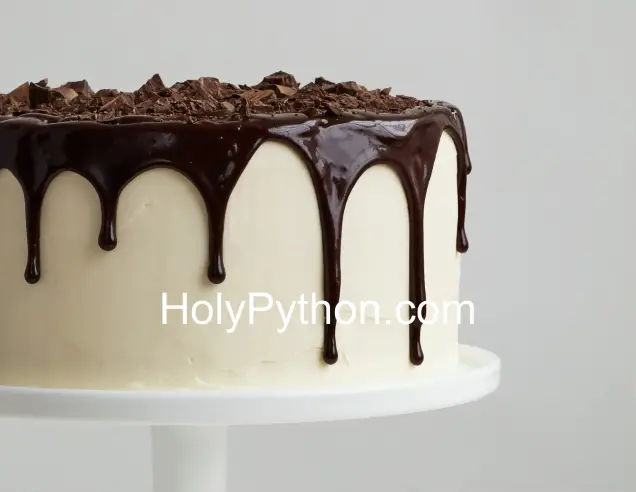
- Applying Text: At this step, we are using fill argument with RGBA parameters in a tuple. (255,255,255,125) will fill the text with approximately 50% transparency and white color, font argument is assigned to font object we created.
- Combining Original Image with Text and Saving: Finally both images are combined using
.alpha_composite()method. Then the new image object is saved with file name cake_watermarked50
Creating Multiple Watermarks (using Python For Loop)
What about multiple small watermarks? Those can be handy too. You might prefer scattered watermarks on your images compared to one big watermark in the middle.
In this case powers of coding start to shine. You can simply place relevant watermarking steps inside a loop and loop it as many times as you’d like.
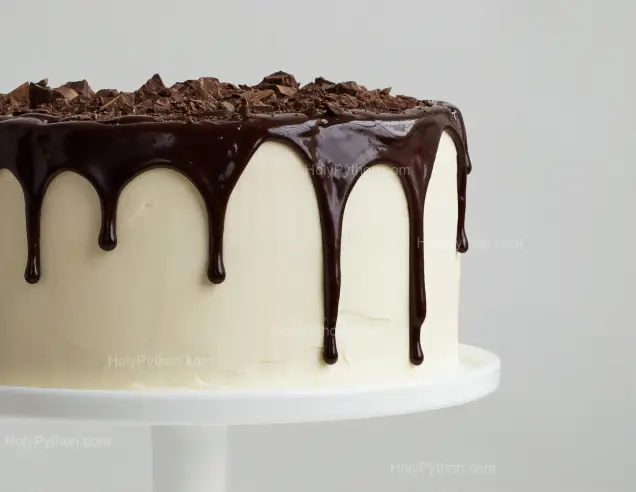
Check out this example: I lowered font size to 27, lowered transparency to approximately 30% and created a loop using range function. x and y positions are randomly chosen with the help of random library. Inside the same loop same text is applied to draw object which creates in multiple watermarks in multiple random positions throughout the image.
Everything else is similar to the previous example. Here is the Python code:
import random
from PIL import Image, ImageDraw, ImageFont

#Opening Image & Creating New Text Layer
img = Image.open(r'Desktop/cake.jpg').convert("RGBA")
txt = Image.new('RGBA', img.size, (255,255,255,0))

#Creating Text
text = "HolyPython.com"
font = ImageFont.truetype("arial.ttf", 27)

#Creating Draw Object
draw = ImageDraw.Draw(txt)

#Positioning of Text
width, height = img.size
# textwidth, textheight = d.textsize(text, font)
# x=width/2-textwidth/2
# y=height-textheight-300

# Loop for Multiple Watermarks
y=200
for i in range(7):
    x=random.randint(0, width-300)
    y+=random.randrange(0,int(height/8), 19)+random.randint(0,100)
    draw.text((x,y), text, fill=(255,255,255, 75), font=font)

#Combining both layers and saving new image
watermarked = Image.alpha_composite(img, txt)
watermarked.save(r'Desktop/cake_M_30.png')
Regarding positions in the loop, I’ve just assigned a random integer to x coordinate and excluded 300 pixels from the end so that text doesn’t start too late horizontally and get cut off.
Regarding y coordinate, I tried a slightly more sophisticated approach in an attempt to avoid overlapping watermarks. y starts at 200th pixel and incrementally increases In a range between 0 and “height of the image divided by amount of watermarks”. Then a random integer between 0 and 100 is added to create more randomness.
You can play with it to see a more optimal solution. I’m sure someone can come up with a smarter distribution model regarding x and y coordinates in multiple watermark situations.
You can check out Watermarkd Python library here and its source code here. Watermarkd has an improved watermark positioning algorithm with batch function (for watermarking multiple files at once) and GUI components.
Conclusion & New Ideas (Batch Watermarking, GUI Watermark Application)
This is the end. Hopefully this tutorial can be useful for many people. Besides being a totally practical topic, I find it also helpful to practice Python and gain new coding skills.
Additionally you can combine this knowledge with some other Python tutorials we have such as:
- Batch editing images in Python: can be used to create a Python program that applies watermark to multiple images in a batch.
- Creating GUI applications w/ Python: can be used to create a GUI application that helps people select image folder or image file and apply a predefined watermark text.
After this tutorial, you definitely deserved some cake! or another treat that your prefer!
Thanks for checking out this Python tutorial.