In this tutorial we will cover the ABC of Anaconda, an open-source python installation solution.
A) Anaconda Benefits
B) How to install Anaconda?
C) How to access Anaconda and Python?
A) Anaconda Benefits
Not to say it’s not super convenient for many expert programmers and scientists, Anaconda is beginner coder’s dreams come true. We suggest you jump start your programming journey with installing Anaconda, all free Python Distribution package. Here are some benefits:
1) Complete Package hassle free installation
It comes with so many packages you will need: 1,500+ Python/R data science packages
It comes with useful libraries included hassle free.
Pandas
Matplotlib
Numpy
Scipy
Scikit-learn
TensorFlow
Theano
And many more
It comes with the modules you’ll need.
requests
re
json
webbrowser
PIL
Beautiful Soup
bokeh
seaborn
plotly
scrapy
just to name a few…
It comes with amazing coding environments you can code in Python
Spyder IDE
Jupyter (browser based)
Anaconda Prompt
2) Free and Open Source Solution
Anaconda Distribution is a free solution so you won’t have to pay a fee or even be exposed to ads.
3) Update Management
It will make managing updates of your packages / libraries a breeze.
4) Graphical Interface
It can be confusing for beginner coders to manage everything with command interface. Graphical interface will reduce your stress and allow you to focus on coding skills in the beginning.
5) Local user installation
If you don’t have admin rights at your computer, you can still make a local user installation with Anaconda.
B) How to install Anaconda?
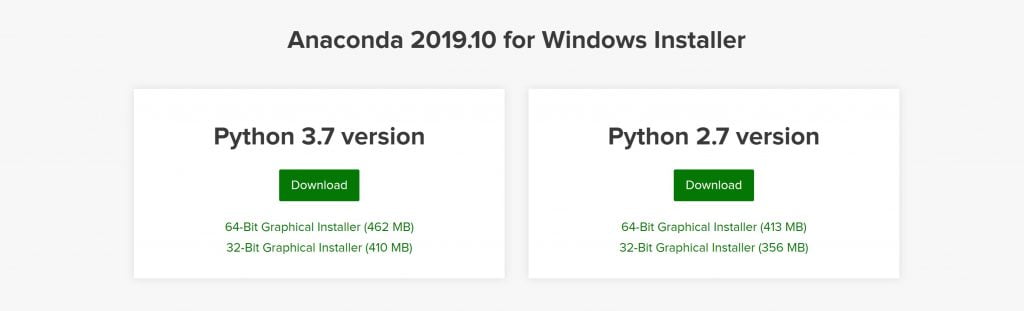
You can easily find Anaconda with a simple search.
We suggest you go with the Python 3 option on the left since it’s newer and you’re more likely to encounter majority of the lessons, practices, community support etc has evolved in that direction in recent years. (Even though Python 2 and Python 3 differences are very minor especially for a beginner coder.)
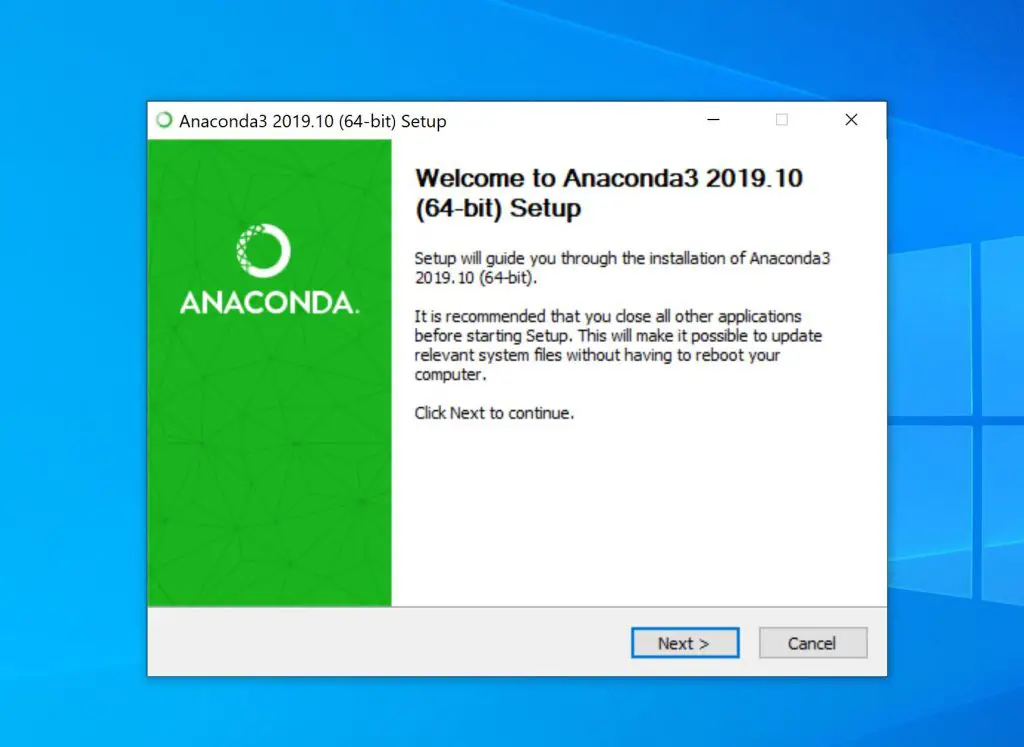
1) Download and open your preferred setup file.
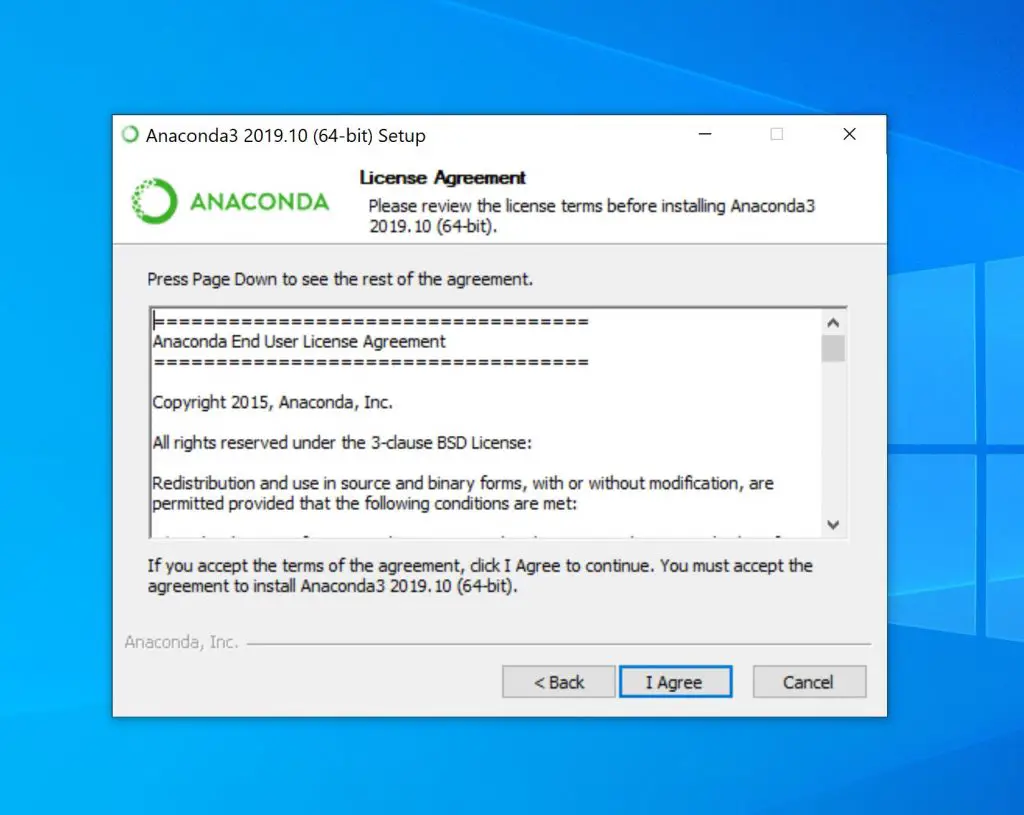
2) Proceed with the user agreement step.
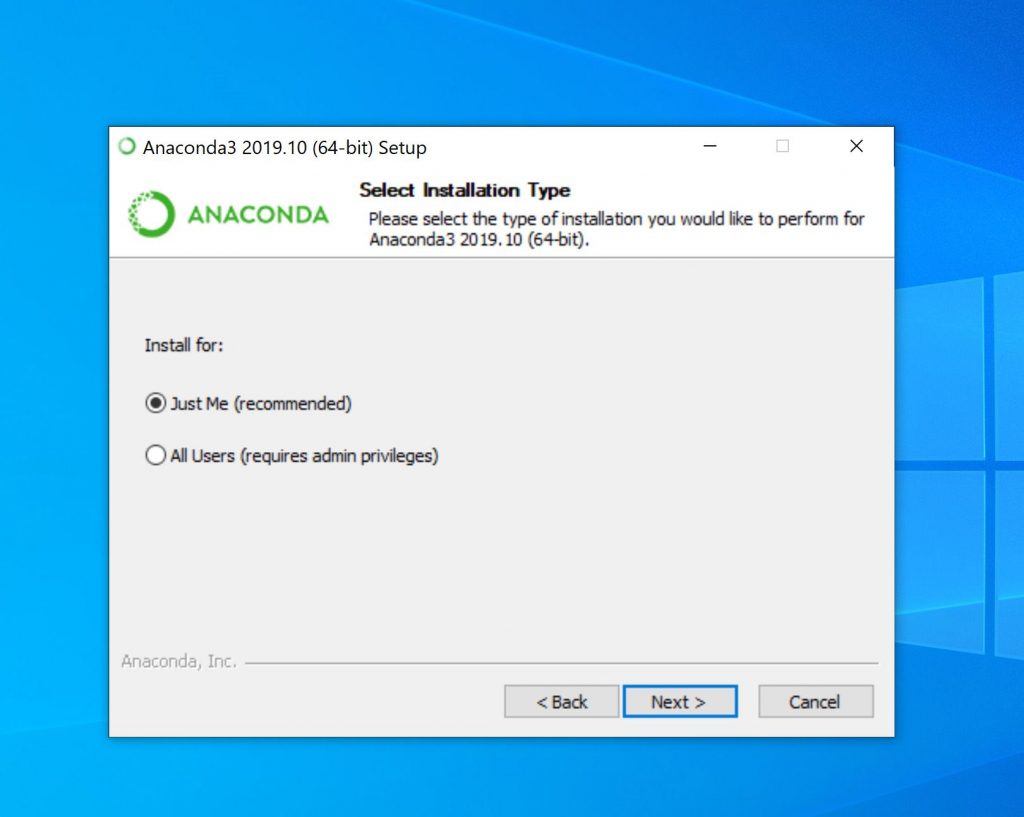
3) Choose installation type (local user vs all users)
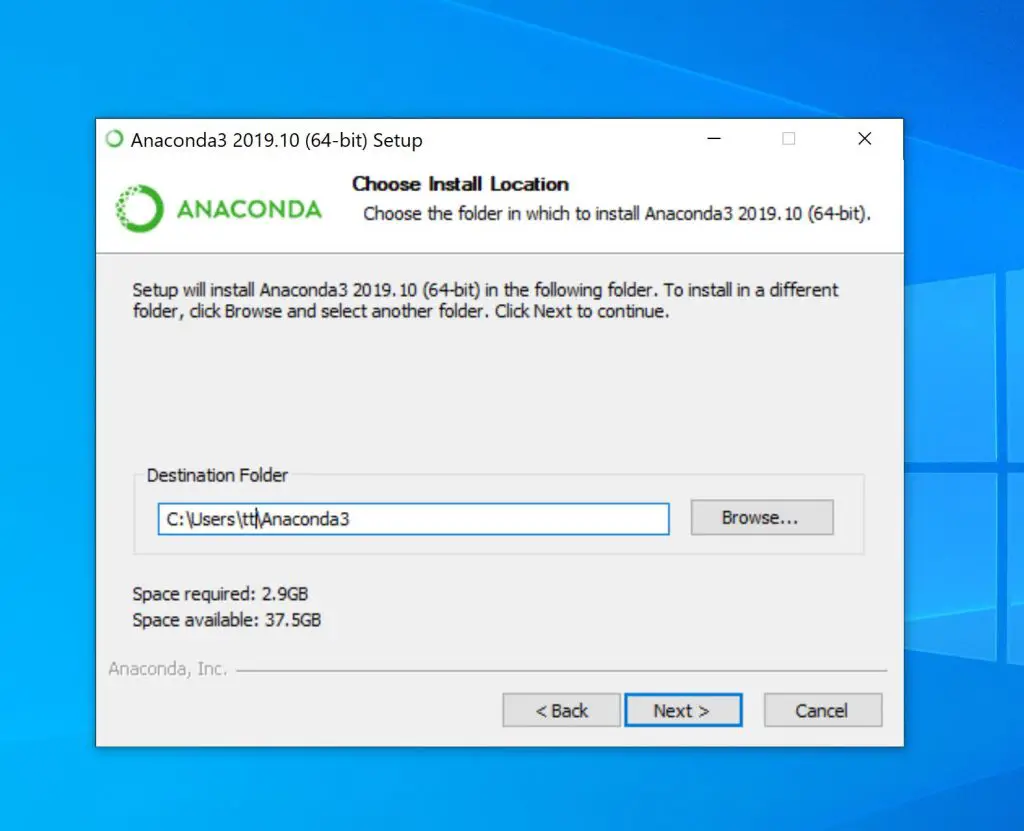
4) Choose your installation path
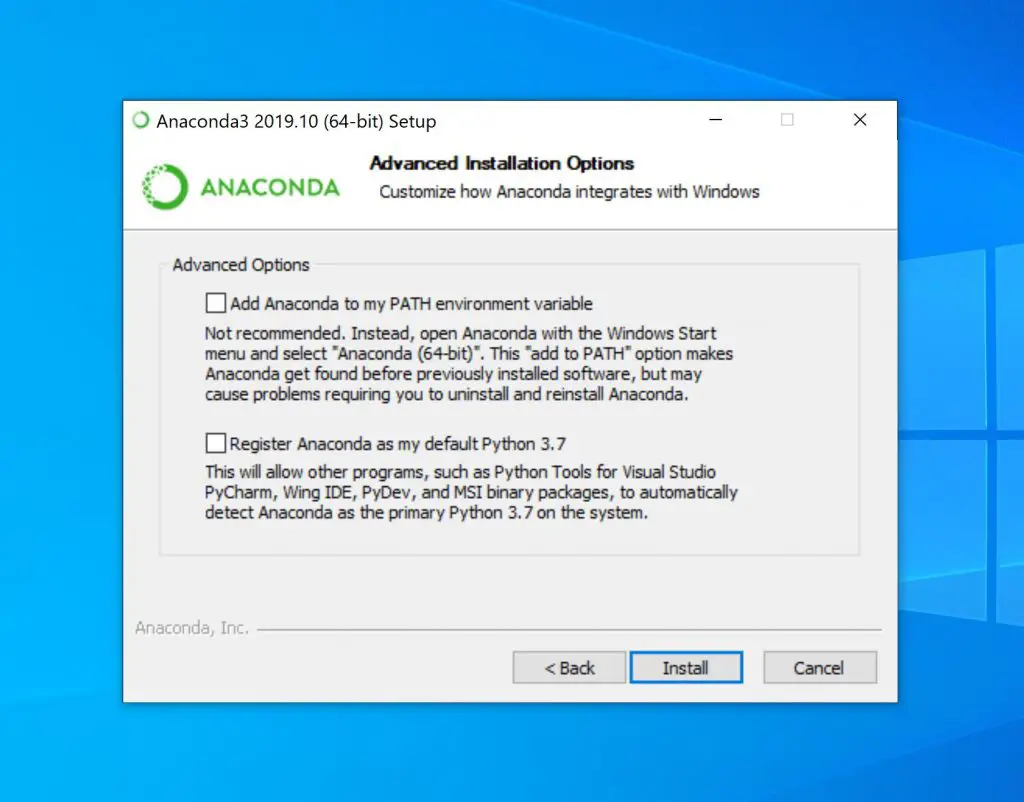
5) Decide advanced options - Suggestion: tick both boxes)
Congratulations - You've installed Anaconda and Python
C) How to access Anaconda and Python?
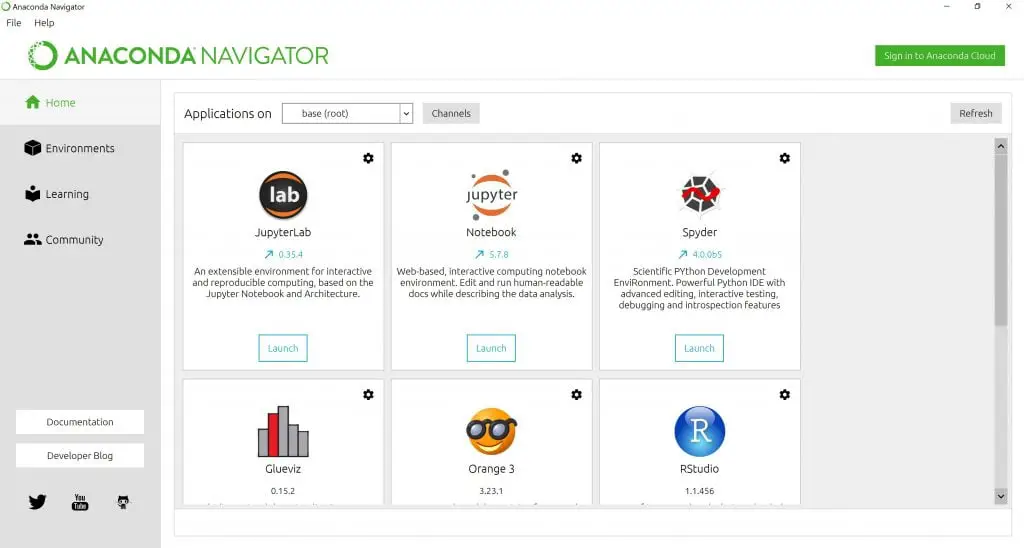
1) Anaconda Navigator
You can access different coding environments such as Spyder or Jupyter via numerous ways.
Anaconda Navigator will be in your installation path and its shortcuts in your Start Menu. You can use it to launch Jupyter or Spyder as below.
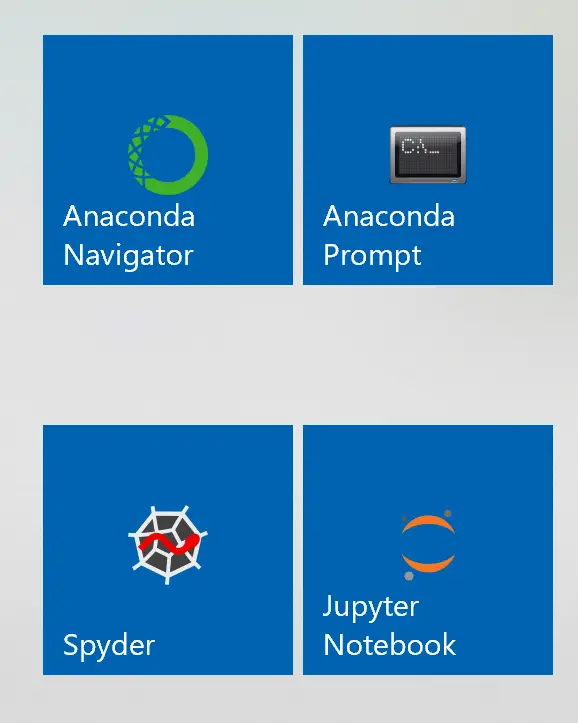
2) Direct Shortcuts
But you can also access shortcuts of these programs directly from your Start Menu. Pinning them in the Start menu can be a good idea for easy access as below:
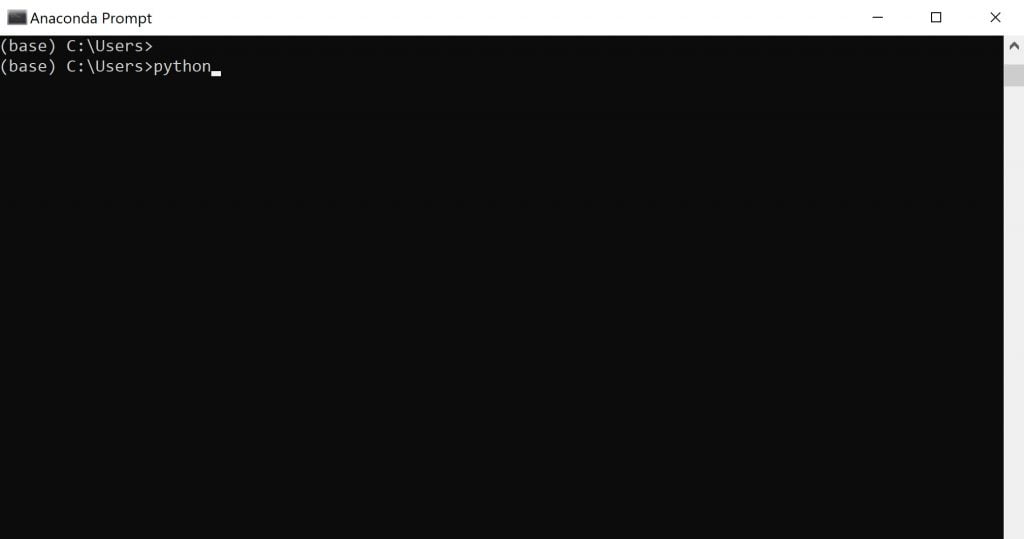
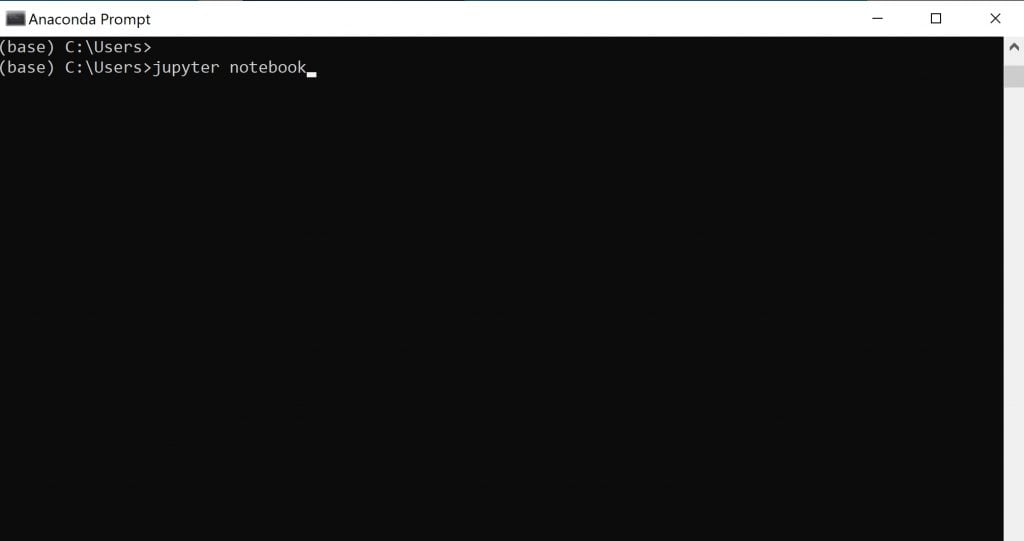
3) Anaconda Prompt
You can also start Python, Jupyter and Spyder from inside Anaconda Prompt.